Article Number: 000192102
Unable to Update the Wyse Management Suite Standard or Private Cloud Certificate
Summary: This article discusses how to resolve issues updating the Wyse Management Suite standard or Wyse Management Suite Private Cloud PKCS #12 certificate.
Article Content
Symptoms
Affected Products:
- Wyse Management Suite Private Cloud
- Wyse Management Suite Standard
An administrator may observe that the self-sign certificate persists in the Wyse Management Suite UI after uploading a third party or domain-generated certificate.

Figure 1: (English Only) Current certificate
This issue may be due to a misconfigured SSL Certificate. The SSL Certificate must match the private as displayed below.

Figure 2: (English Only) Certificate Information
Incorrect setup:

Figure 3: (English Only) Incorrect setup
Cause
A missing private key could be due to:
- The certificate is not installed on the same server that generated the CSR.
- The pending request was deleted from the Internet Information Services (IIS) web server.
- The certificate was installed through the Certificate Important Wizard rather than through IIS.
Resolution
- As an account with administrative permissions, sign into the computer that issues the certificate request.
- Right-click the Windows start menu and click Run.
- In the Run UI, type MMC and then click OK.
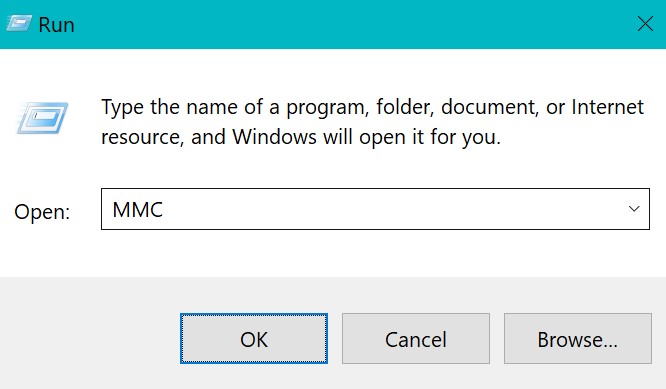
Figure 4: (English Only) Run MMC
- In the Microsoft Management Console UI, select File and then click Add/Remove Snap-in.
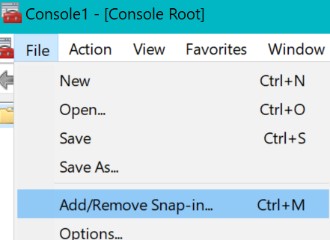
Figure 5: (English Only) Select Add/Remove Snap-in
- Select Certificate and then click Add.

Figure 6: (English Only) Add Certificate
- In the Certificates snap-in UI, select Computer account and then click Next.
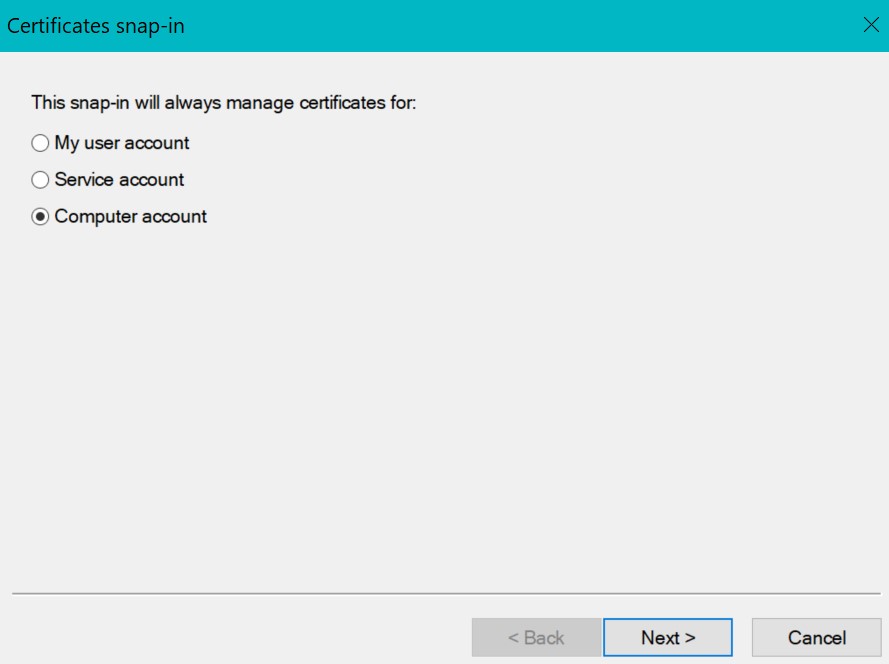
Figure 7: (English Only) Select Computer account and click Next
- Select Local Computer: (the computer this console is running on) and then click Finish.

Figure 8: (English Only) Select Local Computer: (the computer this console is running on) and click Finish
- In the Add or Remove Snap-ins UI, click OK.
- In the Certificates snap-in:
- Expand Certificates.
- Right-click the Personal folder.
- Select All Tasks.
- Click Import.
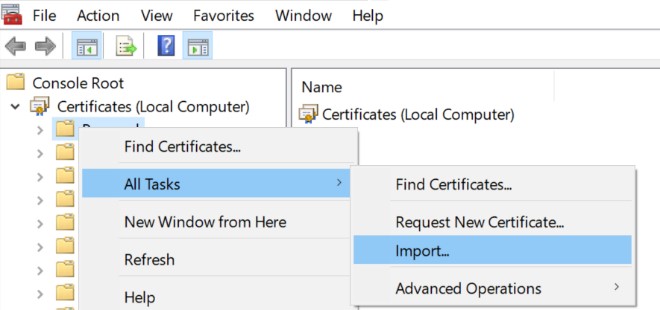
Figure 9: (English Only) Select Import
- In the Welcome to the Certificate Import Wizard UI, click Next.

Figure 10: (English Only) Welcome to the Certificate Import Wizard
- Click Browse.

Figure 11: (English Only) Click Browse
- Go to a certificate (.cer) issued by the domain authority or third-party vendor and then click Open.
- Click Next.
- Select Place all certificates in the following store and then Browse to the Personal folder.
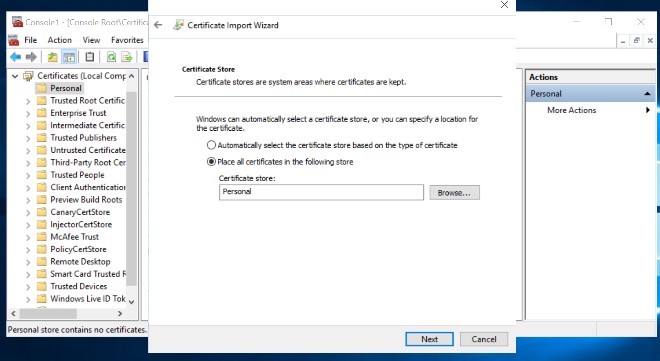
Figure 12: (English Only) Select Place all certificates in the following store and Click Next
- On selection, click Next.
- Click Finish to close the Certificate Import Wizard UI.
- In the Certificate MMC UI, double-click the certificate that was imported into the Personal folder.
- In the Certificate UI, select the Details tab.
- Document the Serial Number value.

Figure 13: (English Only) Serial Number value
- Click OK to close the Certificate UI.
- Right-click the Windows start menu and click Run.
- In the Run UI, type CMD and then click OK.
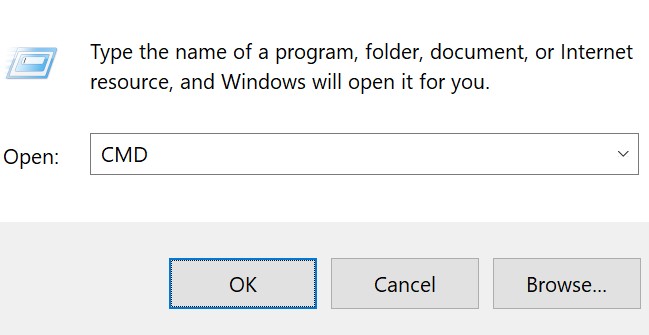
Figure 14: (English Only) Run CMD
- In Command Prompt:
- Type:
ConsoleCopy

Certutil –repairstore my [SERIALNUMBER]
- Press Enter
- Close Command Prompt
Note: [SERIALNUMBER] is the value that is documented in step 19.
- In the Certificates snap-in, right-click Certificates, and then select Refresh.
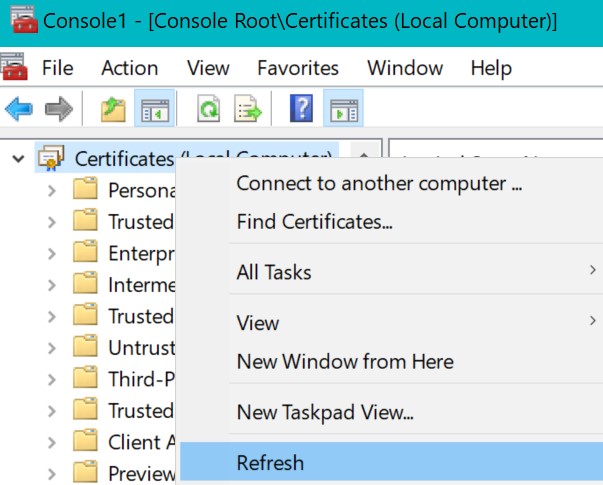
Figure 15: (English Only) Click Refresh
- Navigate back to the Wyse Management Suite administrative UI and reattempt to upload the certificate.
Note: If the problem persists, reach out to Dell Technical Support for assistance. For more information, How to Get Support for Wyse Management Suite.
Article Properties
Affected Product
Wyse Management Suite
Last Published Date
11 Oct 2023
Version
4
Article Type
Solution